
The NodeMCU programming can be as easy as in Arduino,the main difference is the distribution of pins in the nodemcu board.Following below operations and enjoy your first NodeMCU & Arduino IDE travel!
Step 1: Connect Your NodeMCU to the Computer
Use the USB cable to connect your NodeMCU to the computer,you will see the blue onboard LED flicker when powered up, but they will not stay lit.
Step 2: Install the COM/Serial Port Driver
In order to upload code to the ESP8266 and use the serial console, connect any data-capable micro USB cable to ESP8266 IOT Board and the other side to your computer’s USB port.
The new version NodeMCUv1.0 comes with the CP2102 serial chip,you can download and install the driver from:https://www.silabs.com/products/development-tools/.... The NodeMCUv0.9 comes with the CH340 serial chip,you can download and install the driver from:https://github.com/nodemcu/nodemcu-devkit/tree/mas...
Step 3: Install the Arduino IDE 1.6.4 or Greater
Download Arduino IDE from Arduino.cc (1.6.4 or greater) – don’t use 1.6.2! You can use your existing IDE if you have already installed it. You can also try downloading the ready-to-go package from the ESP8266-Arduino project, if the proxy is giving you problems.
Step 4: Install the ESP8266 Board Package


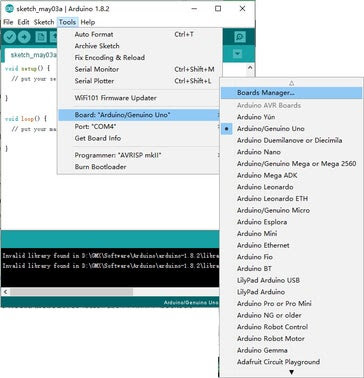
Step 5: Setup ESP8266 Support


Comments
Post a Comment